CHS
CHS Walsun Mall
Support

 Knowledge Base +
  2023.12.08
Locating faults in fiber optic cables requires specialized tools and techniques. Here are the general steps to find a fault in a fiber optic cable:
Visual Inspection:
Connector Endfaces: Inspect the connector endfaces using a fiber optic microscope. Look for dirt, scratches, or damage on the connectors. Clean connectors if necessary using appropriate cleaning tools.
Optical Time Domain Reflectometer (OTDR):
Use an OTDR to measure the time it takes for a light pulse to travel through the fiber and reflect back. An OTDR provides a graphical representation of the fiber, indicating any breaks, bends, or other issues. It is particularly useful for locating faults in long-distance installations.
Power Meter and Light Source:
Use a fiber optic power meter and light source to measure the power loss in the fiber link. By comparing the transmitted and received power levels, you can identify the location and magnitude of the fault.
Visual Fault Locator (VFL):
A VFL emits visible light into the fiber, making it useful for identifying breaks, bends, or macro bends in the cable. It can be especially helpful for identifying faults in short-distance links.
Fault Locating Techniques:
Macro Bends: Look for macro bends or severe bends in the fiber, which can cause signal loss.
Micro Bends: Use a microscope to inspect the fiber for micro bends, which may not be visible to the naked eye but can still cause signal degradation.
Cleaved Ends: Ensure that fiber ends are properly cleaved, and there are no fractures or uneven cleaves.
Testing by Segments:
Divide the fiber link into segments and test each segment separately. This helps narrow down the location of the fault.
Check Splices and Connectors:
Inspect fiber splices and connectors for proper alignment and cleanliness. Misaligned or dirty connectors can cause signal loss.
Use of Tone Generators and Continuity Testers:
In some cases, tone generators and continuity testers can be used to identify breaks in the fiber optic cable by applying a tone to one end and detecting it at the other.
Documentation:
Refer to any documentation or records related to the installation, including cable maps and splicing records, to identify potential areas of concern.
It's important to note that troubleshooting fiber optic cables can be complex, and the appropriate tools may vary based on the nature of the installation and the specific fault. If you are unfamiliar with fiber optic troubleshooting or if the issue persists, it is advisable to seek assistance from experienced technicians or professionals with expertise in fiber optic testing and troubleshooting.
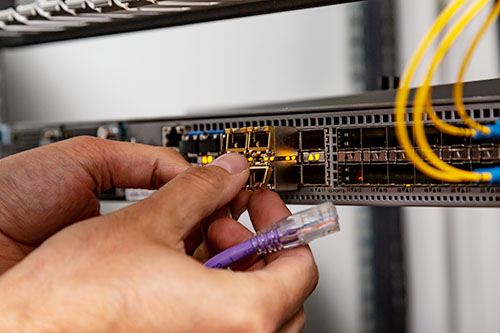
1G SFP Port on Gigabit Switch Cannot Take 10Gb SFP+ Optics on 10Gb Switch in All Cases
Will 10Gb SFP+ running at 1Gb? The answer is definitely "No" SFP optics do work in SFP+ slots in most cases, but SFP+ optics on 10Gb switch can never work in SFP slots on gigabit switch. The reason is about a power availability thing. As we know, once an module is installed, the speed of the port is decided. Most SFP+ slots are backward compatible with SFP modules to run at 1G speed. However, the SFP slots on gigabit switch cannot support the 10G speed required by SFP+ modules. For instance, most Cisco and FS 10Gb switches support 10G SFP+ and 1G SFP optics on their SFP+ ports. But some Brocade gear and HP A-series models are SFP+ only. One need to double check the compatibility of this switch with the vendor rep.

Subscribe to the newsletter
for all the latest updates.


2-5# Building, Tongfuyu Industrial Zone, Aiqun Road, Shiyan Street, Baoan District, Shenzhen. China